Monday, May 12, 2008

Round Shapes

Today's tip is for rounding shapes. If you've tried to get round shapes in XAML you may have encountered some problems. The simple way to round out corners is to give your shape a thick stroke, with the line-join property set to round. Unfortunately, if your fill color is a linear gradient it is a huge pain to keep the stroke brush and fill brush in sync as you edit. If your fill is a radial gradient it is often impossible to align the fill and stroke (it appears the size and position of the radial fill is determined by the bounding box for the fill area, which is larger for the thick stroke than the interior). In any case, Vectropy has a few tricks up its sleeve to take care of you.

Make your shape. I'll stick with the star we've been using for all the examples so far:


Now give your shape the thick stroke to round out the corners, as you would have before:


Now choose "Outline Stroke" from the editing menu:


There you go! Vectropy has replaced the old shape with a new shape that matches the outline of the old shape including its stroke.


Now instead of a pointy shape with a big outline to make it round, you have a round shape that you can outline properly:

Friday, May 9, 2008

Composite Shapes

While the majority of UI objects are solid shapes, some graphics assets, animations, and interesting new UI elements make use of shapes with holes. WPF applications will even properly hit test these objects, allowing you to "click through" an object's hole to a lower object visible through the hole. So how do you create objects with holes in Vectropy?

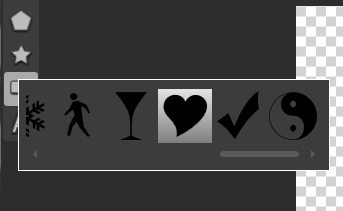
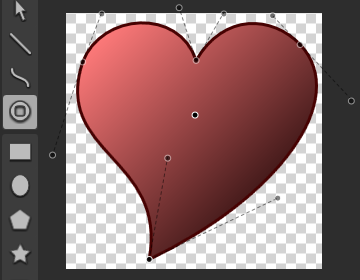
We'll look at two different ways. The first method is by combining multiple shapes to create a single more complex shape. So, I guess we'll need some shapes. To get some quick shapes, I first created one of the items from the preset library (right click the preset button to quickly browse available presets).


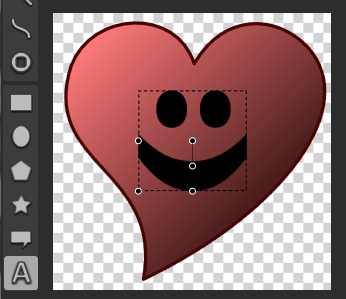
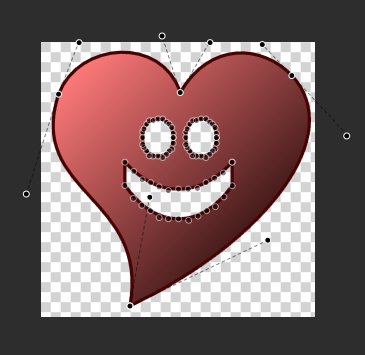
Then, just for some variety, I used the text tool to create the second shape: a smiley face, rotated vertically.


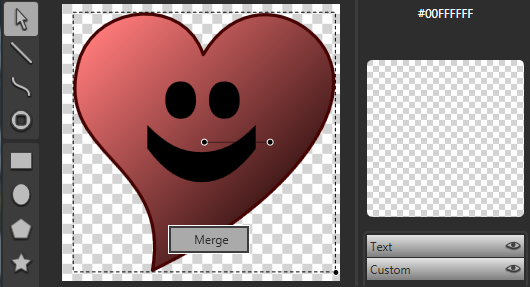
To intersect objects, select all of the shapes you would light to merge, then right click and select "Merge".


You will now have a single merged shape:


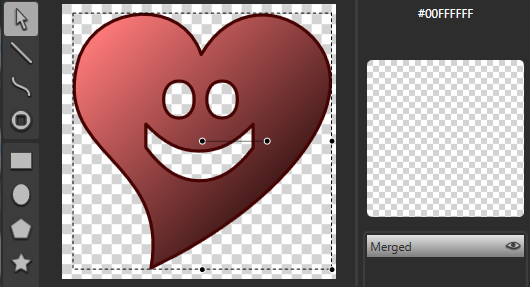
It's worth noting that your new shape is purely a vector object. The font used to create the text simply created a vector object in the shape of the characters (even before merging). This means you'll never have to worry about a missing font on the user's computer, nor will you have to concern yourself with bundling font files in your application (and all the legal issues that arise from redistributing fonts). If you edit the merged object, you can see the new, more complex shape, as well as the vector outline of the text.


Now that you know how to intersect shapes, you can see the other method of creating holes: the holepunch tool. While editing an object you can use the holepunch tool to poke a hole (or create a separate region outside the original object).


Once the new region is created, you can use the regular line tools to add to it, shaping the hole.


You have now seen how to create composite shapes in Vectropy. Try playing with the fill options for your merged shapes to see the different ways of filling shapes with holes. For example, the "non-zero" fill method will fill the entire shape, even the holes, making what used to be holes into additional disjoint outlines within the shape.

Thursday, March 6, 2008

Extending Assets

Although many XAML images will be used as graphical resources in various user-interface controls, you may want to create an object or control directly from your XAML designs. Fortunately, this is a fairly straightforward task. Behind the scenes, your XAML creations have been objects all along, you just may not have noticed. Simply giving your XAML creation (say, MyClass.xaml) a class name will turn it into a full-fledged class.


Now that your XAML object has a class type, you can add a code-behind file (in this case, MyClass.xaml.cs) to contain the associated logic.


Your creation now has a visual appearance, thanks to the XAML graphics, and some functionality, thanks to the code. You'll notice that in Vectropy the names you assign to organize your graphical entities are actually assigned to the underlying XAML objects in the saved file. This allows you to simply reference and manipulate individual parts of your creation without any additional work.

Sunday, February 17, 2008

Glass Button

It seems that no graphics tutorial site is complete without a glass button tutorial. I suppose it 's even more applicable now with Vista's glass UI. In any case, it had to happen sometime, so lets get it out of the way.

This button will be the standard bottom-lit, shiny orb. To get started, create the main part of the button by adding an ellipse with a radial gradient starting at the bottom.


Add a concentric ellipse atop the previous one. This one will provide both the border, and some shading to give the button a rounder look. Alternately, the border could have been added on the first ellipse. Once you're happy with the border thickness (make sure it's thick enough to make the button stand out a bit), add a short radial gradient from transparent to solid black. If you're using Vectropy, you can smoothly adjust the gradient by scrolling your mouse wheel over the gradient editor.


To make the button appear shiny, shape a highlight on the top of the button. Different shapes will indicate different lighting conditions. Feel free to check out various examples of these buttons around applications you use and see which highlight style you like best. Once you have your highlight in the shape you prefer, simply add a gradient from nearly-solid white to nearly-transparent white.


Now add whatever content or labels you want your button to have.


Depending on your circumstances, you may want your button to be opaque to provide contrast and make it obvious on your interface, or you may want a slightly transparent look to really give the glassy look.

Tuesday, February 5, 2008

Vectropy Tip

Reading manuals actually pays off, heh. Here's a quick tip for Vectropy users that may not have stumbled upon this gem.

If you want to just get some quick inline XAML to put into a file you're working on (e.g. a window layout you're editing in Visual Studio), but don't want to create a whole new image resource in your application, you can just copy and paste from Vectropy. In addition to copying the objects inside the application itself, Vectropy also puts a XAML text version of your selection on the clipboard. Draw whatever quick items you want, select them, and copy them:


Then paste into any text editor you like. Instant inline XAML!

Wednesday, January 16, 2008

Using XAML Assets

First off, I have chosen a XAML editor to use. XAML is simply a text-based language, so the absolute minimum for composing XAML is a general-purpose text editor. Visual Studio comes with a UI designer, but it only allows the placement of buttons, textboxes, etc. It is not a vector graphics editor. After looking around and trying some demos, I chose Vectropy for my graphics editing. You can check it out at http://www.vectropy.com. Although I chose Vectropy, many of my posts should be applicable to XAML graphic creation in general.

Now, to the first hurdle: actually using a XAML image. XAML images can be viewed on their own in a variety of viewers, such as FireFox (on systems with the .NET 3 framework installed). If creating artwork is your goal, your job is done: just put the .xaml image on your webpage and let people see it. If you want to use your creation for something interactive, such as a desktop application, you'll want to get the XAML code into your project environment. I am using Visual C# 2008 Express Edition (a free compiler and IDE) to build my application, but other environments will work in a similar manner. In any case, add your image to your project (for this example my image is called MyImage.xaml).

Vectropy makes things pretty simple by enclosing saved images in an appropriate container so they can be used very easily. If your XAML editor just saves the XAML image as-is, you'll need to open each image in a text editor and add the following around your image content each time you save your image:


You will also have to add your image to the list of resources your application uses. You can do this by making the application definition file (typically called App.xaml) look like the following:


Your XAML image is now incorporated into your project and ready to be used. For example, add the following to your window:


To produce:

Thursday, January 10, 2008

Welcome

Welcome to my XAML graphics blog.

XAML is a relatively new markup language for creating and describing user-interface elements in .NET framework applications (WPF programs, XBAP browser applications, and Silverlight pages). XAML is based on XML, and is the primary format for vector graphics in the latest generation of application interfaces. There are already many sites dedicated to the coding side .NET programming, but not many about designing XAML elements to be used with the code. I will continue to post tips and tutorials as I progress through my various XAML endeavors.

Now that you know what XAML is, you may be wondering why someone would want to use XAML. The main reason for using XAML is that it allows you to create vector-based interfaces for use on any .NET 3 capable platform. Traditional user-interfaces were created using raster images (you probably know several types, such as .bmp, .jpeg, and .png files). These images are all essentially rectangular grids of dots (pixels). Raster images create some problems as images often need to be resized for different types of monitors, different sized buttons, different places on a webpage, or different sized icons. As the image is specified as a grid of dots, enlarging the image simply enlarges the dots. Vector images are composed of mathematical equations that describe the contours of each shape, meaning that they can be resized without any loss in quality. Resizing a vector image makes larger (but equally smooth) curves.


As you can see above, vector images scale much more smoothly. In the case of the vector image, the star is described as a set of ten orange lines, filled with yellow. Resizing this simply draws ten larger orange lines, and fills the shape with yellow. The raster image is a grid of sixteen by sixteen colored dots. Resizing this grid makes a larger grid of sixteen by sixteen dots, barely resembling a star anymore. Using vector images for user interfaces means never having to create multiple copies of an image at different sizes, and never getting ugly blocky images when you resize your application.